Installation instructions - All you need for this course
There will be several coding exercises during the class. You need some way to execute Python code yourself. There are many ways to make that happen. Here are some good options...
- Google Colab — no installation
- Install Python on your computer — recommended for most
- Using the
uv— state of the art - Install Anaconda — everything included, not recommended anymore
Please make sure that you have one of these options available BEFORE the class starts.
Remarks:
The class will use Python 3 and while most features that we can cover are identical across versions, a recent version gives you the best experience - between Python 3.11 and Python 3.13.
Python 3.10 and even Python 3.9 will be sufficient if you have those already installed on your system.
Python comes with many features included. But we will use a few additional packages throughout the class - and you're likely going to need more at some point for your own projects. The following packages (including their dependencies) will be required at some point: numpy, matplotlib, jupyter. Google Colab has all of that already included. I will show during the class how to install these in other scenarios.
You will also need a text editor (something like Notepad on Windows or TextEdit on Mac). Your life will, however, become much easier by using a more advanced "Integrated development environment" (IDE). One possible option is PyCharm, which I think offers a lot of good functionality out of the box for beginners. Another very popular alternative is VS Code (with the "Python" and "Jupyter" extensions).
Option 1) Google Colab — no installation
Google offers a platform to run Python code from the webbrowser in so called "Jupyer Notebooks". That way you avoid installing Python on your computer entirely and for this class you have all you need.
- You need a Google account! If you don't have one already, you can create one that is linked to your Einstein-Email-Address easily.
- Simply go to https://colab.google.com and login with your Google account.
- Optional: You can read through the "Welcome to Colab" Notebook for an introductions.
- Create a New Notebook which will be saved into your Google Drive.
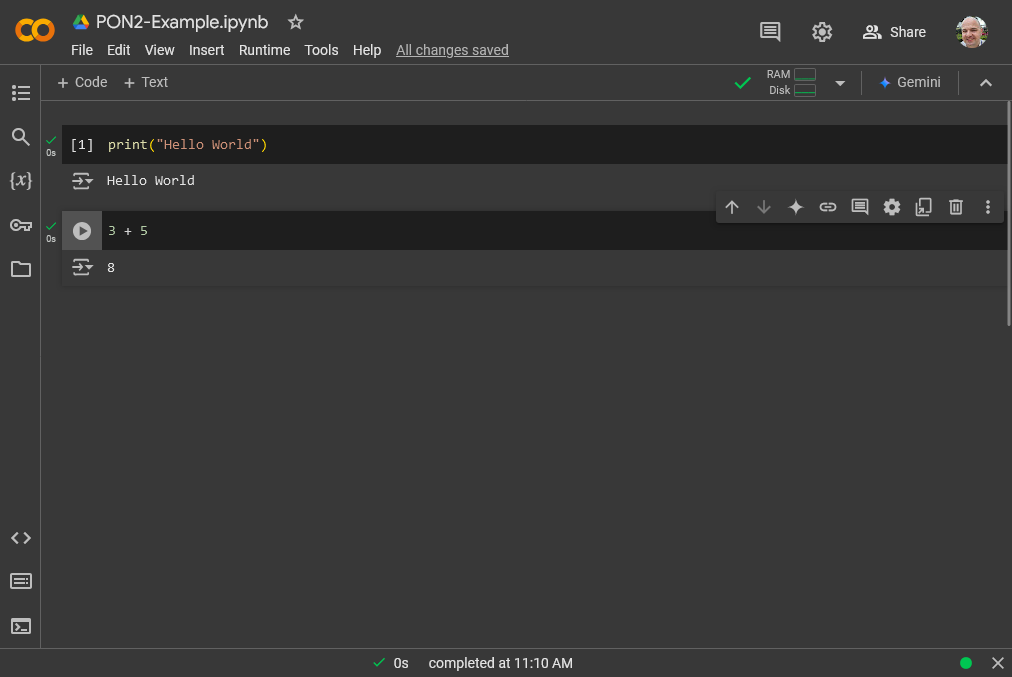
You can then enter your Code in "Code cells" in the notebook and run/execute one cell at a time:

I will give a minimal introduction how to run Code in Google Colab in the first class for those who use it.
Option 2) Install Python on your computer — recommended for most
In most cases, especially if you plan on using Python for data analysis or similar tasks, you might want to install it onto your computer.
- Go to https://www.python.org/downloads/ and download the latest version for your operating system.
- Launch the installer and follow the instructions.
Usually, the default install settings will be fine. This will install Python inside your user profile. You can also choose to install Python for all users (if you have admin rights).
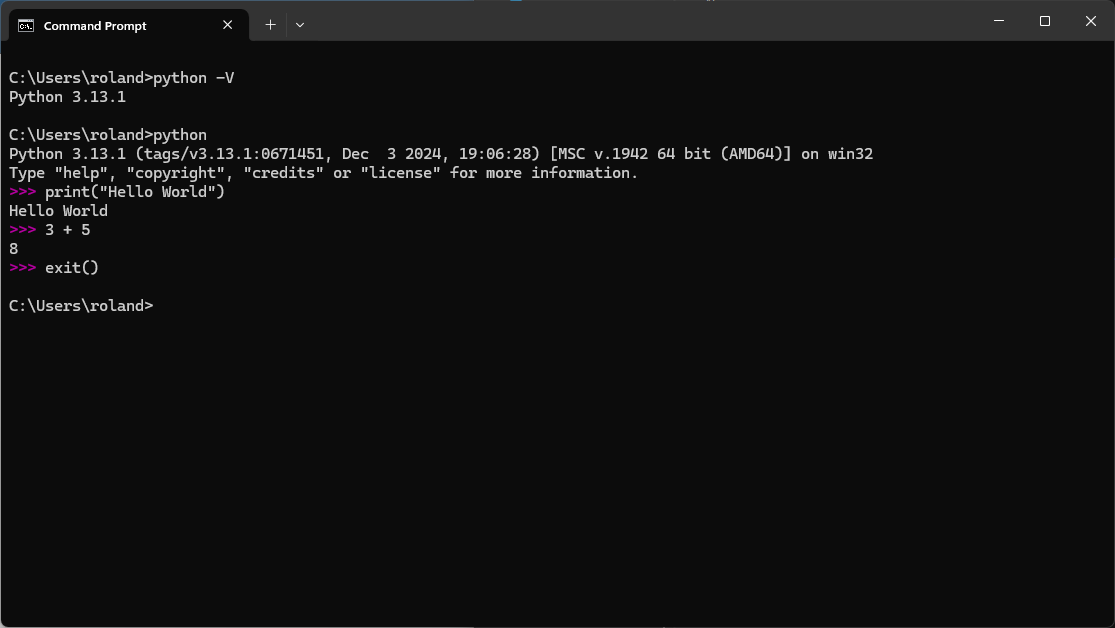
A simple way to test that Python is correctly installed is in the Command Prompt (Windows):

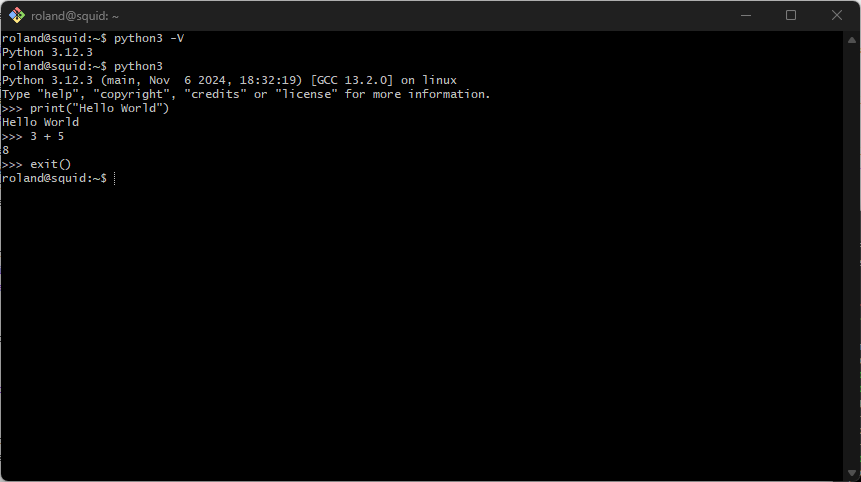
or in the Terminal (Linux or Mac):

We will cover other ways to "run" Python during the class.
We will also cover how to install additional packages such as numpy, scipy, matplotlib and jupyter.
Option 3) Using the uv — state of the art
uv is strongly recommended for everyone who is familiar with the Terminal/Command Line already. But if you're new to all of this, you might delay the use of yet another tool.
- Go to https://docs.astral.sh/uv/getting-started/ and follow the instructions under "Installing uv" that match your operating system.
- With
uv python listyou can see the already install Python versions on your system - Install the latest version with
uv python install - Use
uv run pythonto start the interactive interpreter oruv run scriptname.pyto run a script.
uv really is a game changer for managing Python installations and packages/dependencies. For everyone who seriously uses Python for any projects of their own, it's absolutely worth looking into it. However, it does much more than we need for this course.
Option 4) Anaconda — not recommended anymore
Anaconda, which is available for all major operating systems (Windows, MacOS, Linux), includes a large collection of "all you probably ever need" (for scientific data analysis and similar tasks).
Installation instructions can be found in the Anaconda documentation and I strongly recommend following them: https://docs.anaconda.com/anaconda/install/
- Go to: https://www.anaconda.com/products/individual#Downloads
- Download the current version (should be "Python 3.11") for your operating system (Windows, Linux, or Mac)
- Execute the installer and follow the instructions
You now need to sign up for an Anaconda account.
You will want to chose the 64-bit version of Anaconda on most modern computers (bought within the last ~10 years).
If you already have Anaconda installed with any Python 3.x version, you don't need to upgrade to 3.9. However, the built-in Python 2.7 in many Mac/Linux systems is usually not sufficient.
If you don't have administrator rights on your computer, it's safe to install Anaconda as a normal user (Select "Just me" when you're asked). In fact, if you're the only user using Anaconda on your computer, this is the preferred option because it makes updates later much easier.
You do not need to install PyCharm, but you may give it a try. It's a popular Editor/IDE for Python which I haven't used myself, yet.
If your computer has limited main memory (hard drive) the full Anaconda package might be too much. It takes about 2GB with the full installation. You can instead install a smaller subset of package, following this article: https://medium.com/dunder-data/b48e1ac11646
Last updated: 2025-01-06